Production Meteor and Node, Using Docker, Part VI
MongoDB Replication Using Volumes
In the Docker NetOps world, there is still a wide range of opinions on how to handle stateful services such as databases. A common fear is that we’ll lose all our data if our container crashes. Right?
No! This is not actually true!
The trick is that Docker Compose, which Docker Cloud uses in the background, remembers which volumes your containers use and reconnects them when the container is re-deployed. MongoDB, in turn, automatically reconnects to configured replica sets at startup. So, the replica set only needs to be configured once.
I know because we’ve already gotten this to work. Allow me walk you through it:
First, create a MongoDB service in Docker Cloud using an image that supports specifying a replica set.
,em>(Hint: You can use our popestepheng/meteor-mongo image for this.)
Project Ricochet is a full-service digital agency specializing in Open Source & Docker.
Is there something we can help you or your team out with?
Next, create the service:
- You must spin up at least three containers. A replica set needs at least three members to do anything useful.
- I recommend using the High Availability deployment strategy here. That way the replica set members are spread over your node clusters, and ideally different providers.
- Set at least the following environment variables:
- REPL_SET: The name of the replica set. A simple value like rs1 will do the trick.
- AUTH: no
- Setting this is required, because otherwise you won't have the permissions to set up the replica set (at least if you're using our MongoDB image). Don't do this in production!
- Check tutumcloud/mongodb on github for other environment variables you can use.
How to Configure the Replica Set Manually:
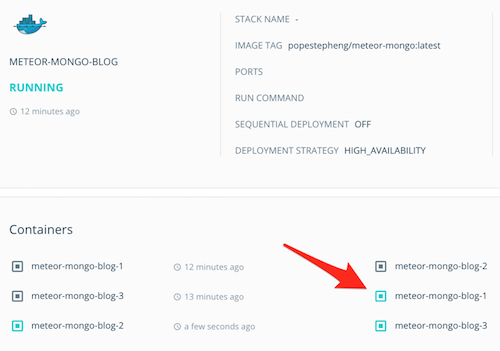
Once you have spun up the service, click on the first container:
Then, the Terminal tab:
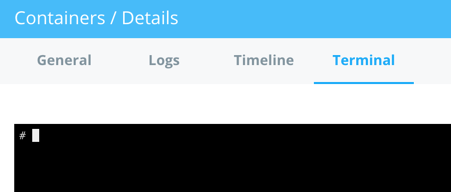
Here’s what you want to run first. Explanation below.
# Use your actual service name plus -1, -2, etc. here.
# If you have more containers, follow the pattern and modify the commands to add more variables and more rs.add() commands.
export MONGO1="meteor-mongo-blog-1"
export MONGO2="meteor-mongo-blog-2"
export MONGO3="meteor-mongo-blog-3"
# Note: you have to add -u admin -p $MONGODB_PATH if you are using authentication.
mongo $MONGO1 --eval "rs.initiate(); myconf = rs.conf(); myconf.members[0].host = '$MONGO1'; rs.reconfig(myconf,{force:true}); rs.add('$MONGO2'); rs.add('$MONGO3');"
There are two main parts to this script. In the first one, we simply alias the names of our Mongo containers to shell variables. Nothing fancy — it just makes the following command a little easier to read.
The second command is a one-liner that starts a replica set, configures the first container to be the first member, applies the configuration, and then adds the other two containers as members of the replica set. You will probably just see something like [object Object] in the terminal after running the command.
use testdb;
db.testdb.insert({ works: 1});
Then, go back to Docker Cloud and connect to the Terminal of the SECOND container (the one ending with -2).
Run:
mongo
rs.slaveOk(); # This tells Mongo to let us read from a secondary
db.testdb.find();
You should get back something like:
{ "_id" : ObjectId("5748b3458b5a272dbd179bfb"), "works" : 1 }
Congrats, replication worked!
Try redeploying the containers afterward, connecting to the MongoDB shell, and running rs.status(); You should be able to make out in the results that the replica set is still configured and see health: 1 for each member. If not, make sure you didn’t accidentally reduce the number of containers in your service configuration or something. I’m not saying that I did that while writing this or anything. :)
Scaling
Also note that if you add more MongoDB instances, you will have to go in and add them to the replica set with rs.add(). It’s also worth mentioning that you have to run that command on the primary. For all intents and purposes, the primary is almost always the first container in this setup.
Well, there you have it: Production Meteor and Node, Using Docker! I know you can hardly believe we’ve covered so much in such a short, entertaining series. So many laughs. So many tears.
But hey, don’t start packing up your book bag so quickly! I’ve got just one more post coming your way to help tidy up the mess we’ve made. In the final installment, I’ll cover backups. Once that’s done, you can be on your merry way.
Click here for the next installment in the series.
Click here for the previous installment in the series.
Curious about how much it might cost to get help from an agency that specializes in Docker?
We're happy to provide a free estimate!